Round 2 of Brady Kirkwood's Q&A for the Jewelry Armoire / Lingerie Chest build he's going to undertake. He graciously agreed to let me publish his questions alongside my answers in case anyone else finds use in them.
Question #2
If making the project again, would you put the panels in all the web frames between drawers or just keep them open? (you might be able to tell, I am trying to cut down the sheer number of piece parts in this project)

My Response:
I would.
Firstly, because I don’t want dangling necklaces or earrings to fall into the drawer bays.
Secondly, I was super enamored with one of Tom Fidgen’s builds in his book Made By Hand.

I took a lot of inspiration from that project. He had a SketchUp model at one point, and I was able to dissect it piece by piece to see how he put it together and walk through the joinery decisions he made. It was fascinating and is probably one of the most efficient ways I've found for learning complicated carcass joinery methods.
The beauty of the thin panels suspended in those web frames with no glue was just such a clean look and really added some class for when you open the side door. At one point I considered using poplar and covering the entire interior of the door bay with velvet, but my wife liked the bright look of the maple. So we used waterborne polycrylic for the maple parts to keep it looking white and not yellow like it would with an oil-based polyurethane. It's a nice, bright surprise when you open the side doors and contrasts nicely with the darker tones of the oak.
Tom's was a very complicated build and I was as hungry for the challenge of suspending those panels as I was interested in their thin, delicate beauty.
In general, I don't think making, prepping, and fitting those side panels was that big of a deal. Cut them to rough size out of 3/4" thick stock, resaw each piece in half, flatten one surface, run them through the thickness planer, shoot them to their final dimensions. Done.
The real effort and focus was in the drawer web frames and getting them mounted correctly in the legs. Once that was done, it's just some plow planing (which is super fun anyway) to make a groove for the panels. I used a router table with a fence to run the groove down the long legs.
I do remember having a feeling of real satisfaction when the panels first went in, though.
M'mmm... so smooth... it's almost like I knew what I was doing all along, ...or something.
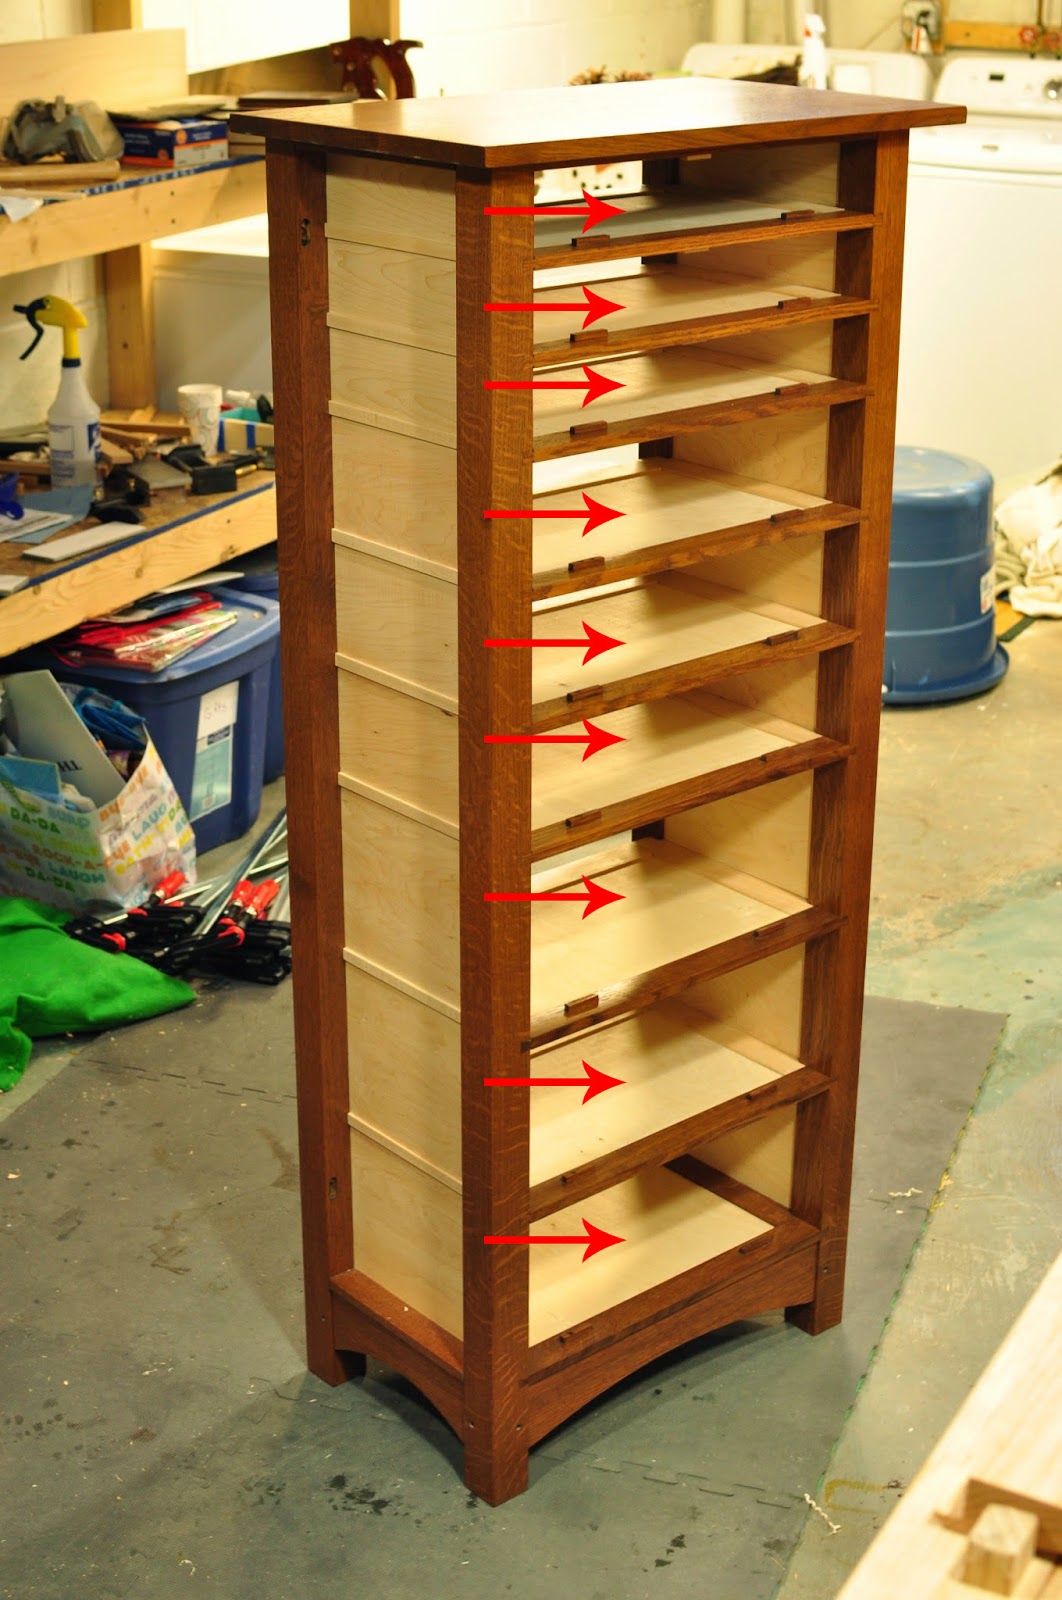
UPDATE: Brady has informed me that he was actually asking about the horizontal panels within each web frame. So I'll answer the question again.

I would put them in again. Clothes piled too high in a lower drawer may interfere with the function of the drawer above it. A piece of jewelry may fall out of place and without these dust panels in place, you may have to remove every single drawer in order to find it.
They are just 1/4" Baltic Birch plywood and were the easiest thing to make in the entire project :P
In retrospect, it wouldn't have been a difficult thing to design for a solid wood panel with an expansion gap, but I see nothing wrong with using plywood when it makes sense. No one sees this part of the dresser, it's a large surface area to cover, and solid wood panels would have been a pointless expense for no functional, structural or aesthetic gain.
UPDATE: Brady has informed me that he was actually asking about the horizontal panels within each web frame. So I'll answer the question again.
Question #3 (again)
If making the project again, would you put the panels in all the web frames between drawers or just keep them open? (you might be able to tell, I am trying to cut down the sheer number of piece parts in this project)
My Response:
They are just 1/4" Baltic Birch plywood and were the easiest thing to make in the entire project :P
Why did I choose to use plywood when I've been so fussy on every other detail?
Because I wanted them to fit perfectly within those web frames, forcing them to an exact and square dimension. During the glue-up they were applying lateral pressure to keep the web sides pressed into the notches in the legs. I wanted to glue the web back rails in place, and didn't want to allow for expansion here.In retrospect, it wouldn't have been a difficult thing to design for a solid wood panel with an expansion gap, but I see nothing wrong with using plywood when it makes sense. No one sees this part of the dresser, it's a large surface area to cover, and solid wood panels would have been a pointless expense for no functional, structural or aesthetic gain.
No comments:
Post a Comment