Round 3 of Brady Kirkwood's Q&A for the Jewelry Armoire / Lingerie Chest build he's going to undertake. He graciously agreed to let me publish his questions alongside my answers in case anyone else finds use in them.
Question #3
What would you do differently, either in the making or the design?
What would you do to make the assembly easier?
My Response:
I wrote up a "What Went Wrong" summary at the end of the project. I'll pull some from there.
- I never replaced those phillips-head screws for the back panels like I said I was going to. I got too tired and didn't want to wait for an order of screws. Note to Chris Schwarz: don't look back there.
- The aniline dye bled into the maple drawer sides. I attempted to tape these off to keep them pristine, but it didn't work out. Next time I'll prefinish the drawer fronts and then assemble. Then when I'm fitting the drawers, I'll just plane their end grain off. If I go in carefully with a paintbrush I might be able to just darken them a bit without it bleeding into the maple. The only other method I can think of is to make my dry-fit as close to the drawer opening as possible so I don't have to remove any material. Not sure how I feel about this approach.
- I continue to have trouble with drawbore pins blowing out the grain on the far side. Quartersawn White Oak is brittle in parts, so that certainly doesn't make it any easier, but I need more practice. I've solved this on the Flip-Top Table build. Basically I use less of an offset for Quartersawn White Oak (1/64" to 1/32" maximum), and I spend a lot of time making the tips of my drawbore pegs perfectly hemispherical. I used to sharpen them to a pencil point, but the point was catching the grain on the far side instead of sliding past, forcing a blow out. I tried flattening the sharp point, but it wasn't enough. I looked very closely at the pegs in Doucette & Wolfe's Trestle Table Build video and noticed his tips were much rounder than mine, so I went that route and it worked perfectly. Also, I use my rattail rasp to file the entry hole on the breadboard tenon so that it has a bit of a chamfer. This helps guide the peg into the tenon hole. And finally, hide glue lubricates the peg as it goes in where Titebond II does not. My best advice is practice on scrap until you get it right consistently. If it fails, it fails catastrophically. :P
- I kinda wish I made narrower pins in the dovetails. These look like they could have been made by a machine router bit. I was super nervous going into that phase of the project so I gave myself extra room to screw up, but I think I've got the hang of it now and can start leveling up my dovetails.
- The top isn't perfectly flat because my workbench wasn't perfectly flat. It's close though. If I were to build another bench I don't think I'd bother with the split-top. One solid surface seems like I'd enjoy it better. Add it to the list!
- I took a bit too much wood off a few of the drawer sides when fitting them, removing the possibility of a piston-fit. I had to glue some thin shims to the drawer guides in the lower drawer bays and then plane them back down until the larger drawers stopped jamming. I admit I was impatient at this point and wanted the drawers in and done, but this is the worst kind of mistake after all this work. It's so important to slow down here and take super light passes and keep retesting the fit over and over again. Once you go too far it's too late.
- My drawer closing stops were positioned too close to my drawer guides, thus preventing my large shoulder plane from fitting in there to tune the drawer guides like I intended. I could have bought a smaller shoulder plane, but I chose not to. If I had it to do over, I would have used a rabbeted guide as Mario Rodrigues does (See Popular Woodworking - February 2009 - Issue #174 - 7 Strategies for Better Drawers).
- I should have planned the assembly better in the design phase. I think the main carcass glue-up exceeded 70 parts. I did a ton of dry-fit practice runs beforehand, but still... stressful isn't the word. Also, despite them fitting perfectly during the dry-fit, the sliding dovetail webframe fronts didn't seat flush with the legs. They're probably 1/128" - 1/64" proud of the surface. I beat on them with a mallet really hard, but no luck. And since they were pre-finished, I couldn't plane it flush after assembly. Maybe I won't pre-finish this type of assembly next time for this very reason.
- I still hate machine routers. I had to use it for the 52" long lock miters in the legs. If I can figure out a way to do this by hand, I'll probably do it. It'll be safer, quieter, slower, and with less potential for grain explosions.
New addition to the list, after living with the dresser for a couple years and looking at it every day....
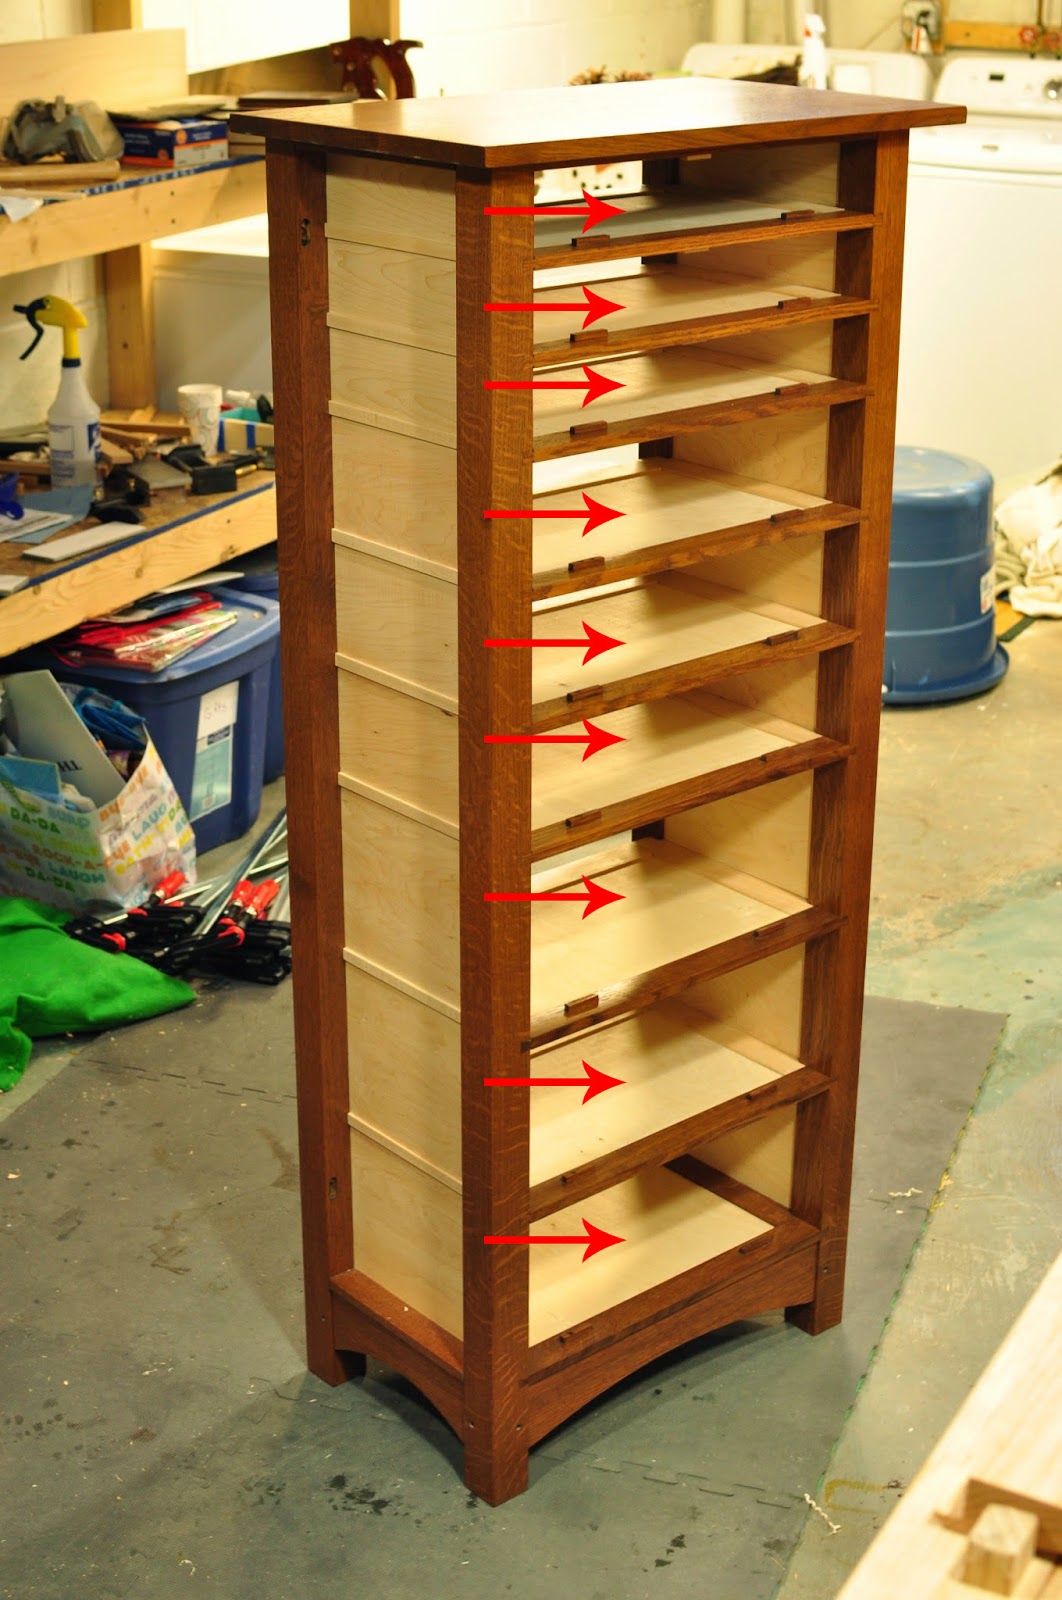
The front drawer blades are displaying flat sawn grain. I find this incredibly distracting. I really wish I trimmed a piece off, rotated it and glued it back on so that these blades would display quarter sawn grain to the viewer.To Simplify the Assembly Phase
With integral side panels, I can't really think of a way to simplify the assembly. Reason being: you can't put those side panels into their slots without putting all of the web frames and all of the legs together in a single glue-up. More than 70 parts in a single glue up. Woo!
My advice is to dry-fit as many times as it takes until you memorize the order. Tune the fit of every joint that shows the first sign of binding. The time to tune isn't when the glue is on. :)
Although...
If you choose to not do the side panels, you can do an initial assembly of legs + top frame + skirts. That will lock in the core length / width / depth dimensions of the entire piece. Then you can take your time and put in one web frame at a time. A much more methodical and relaxing process

Hmm... perhaps there's another way to get those side panels in after the fact. Maybe treat them like glass panels. Put them in place after the initial glue-up and then tack or glue on a little strip of wood to hold them there and to hide the edges of each panel. Like so... hm..... wait... no. Never mind.
If you're going to put the side panels in after the fact, you might as well just put one tall panel the size of the door bay. Or even better, you could do thin, narrow, shiplapped planks in there running vertically. That would certainly simplify the main carcass assembly, allowing you to break it out into stages. It also maintains a consistent overall aesthetic. Not too shabby!

Stage 1: Legs + Skirts + Top Frame + Back (and Side) Mounting Strips (something to screw or nail the shiplapped planks into)
Stage 2: Glue and tap in one web frame at a time. They are pretty much self-clamping, especially with the plywood panels holding them to their exact width, pressing them into the leg notches.
Stage 3: Screw or nail on the shiplapped planks onto the back and inside the door bays
Stage 4: Glue on the rabbeted Drawer Guides, attach the Top
Stage 5: Make and mount the Doors & Hinges, tune the fit
Stage 6: Make & fit the Drawers
Stage 7: Attach the Drawer Stops, Door Catches, Knobs
There's probably more, but this is off the top of my head...
By removing the side panels and their captive grooves, you will be able to reduce the width of the web frame sides, as some of that material is now unnecessary. This will allow you to have 3/8" thick shiplapping for the door bays and end up with the same internal volume I did. But if it were me, I'd make 1/4" thick shiplapping, as every bit counts in that cramped space.
By removing the side panels and their captive grooves, you will be able to reduce the width of the web frame sides, as some of that material is now unnecessary. This will allow you to have 3/8" thick shiplapping for the door bays and end up with the same internal volume I did. But if it were me, I'd make 1/4" thick shiplapping, as every bit counts in that cramped space.

I spent a lot of time trying to figure out a way to maximize the storage space in there without sacrificing wood strength or creating weak wood joints. The easiest option is to have wider legs, pushing the doors out farther, but I wanted to keep it looking as slender as possible. It's a tight space and a difficult puzzle to solve.